Hexo添加搜索功能与百度分析
原创💡 Abner Mai 2021-08-30 约 1034 字 大约 3 分钟
# Hexo添加搜索功能与百度分析
前两篇文章讲了搭建Hexo个人博客和主题的更换:
但是主题里边有个搜索功能,一开始使用的时候,浏览器控制台总是报错,说content.json 404
懵了,主题切换的时候没注意,然后一直想怎么弄出来这个文件
现在,开始添加搜索功能,然后在加入百度分析
# 搜索功能
# 自动生成
一个很简单的方法,那就是让它在构建的时候自己生成"content.json"文件
- 打开 Git Bash Here 程序
- 输入命令
npm i -S hexo-generator-json-content安装组件 - 在相对应的主题目录下的 "_config.yml" 文件下加入配置代码:
	# 自动生成content.json
	# https://github.com/alexbruno/hexo-generator-json-content
	jsonContent:
	  meta: true
	  keywords: false # language name option
	  dateFormat: undefined # format string
	  pages:
	    title: true
	    slug: true
	    date: true
	    updated: true
	    comments: true
	    path: true
	    link: true
	    permalink: true
	    excerpt: true
	    keywords: true # but only if root keywords option language was set
	    text: true
	    raw: false
	    content: false
	  posts:
	    title: true
	    slug: true
	    date: true
	    updated: true
	    comments: true
	    path: true
	    link: true
	    permalink: true
	    excerpt: true
	    keywords: true # but only if root keywords option language was set
	    text: true
	    raw: false
	    content: false
	    categories: true
	    tags: true
1
2
3
4
5
6
7
8
9
10
11
12
13
14
15
16
17
18
19
20
21
22
23
24
25
26
27
28
29
30
31
32
33
34
35
36 - 依次输入命令:
- 输入命令
hexo clean清除缓存 - 输入命令
hexo g构建 - 输入命令
hexo d部署
- 输入命令
- 在hexo目录下会生成public文件夹,在这个文件夹下就可以看到 "content.json" 这个文件了(可以打开,建议格式化之后在区查看)
- 部署好之后,可以在自己的hexo主页使用搜索功能了
# 手动添加
手动添加呢,有点费时间,不过可以自定义条件
首先来看一下有哪些配置项
	{
		"meta":{
	        "title":"", ## 博客标题
	        "subtitle":"", ## 博客子标题
	        "description":"",  ## 博客描述
	        "author":"", ## 博客作者
	        "url":"" ## 博客首页地址
	    },
	    "pages":[ ## 非博客博文的一些页面, 即不在hexo\source\_posts目录下的,但在hexo\source下的md页面
	        {
	            "title":"",
	            "date":"", ## 博客发布时间
	            "updated":"", ## 博客更新时间
	            "comments":true,
	            "path":"", ## 在当前首页地址下的路径
	            "permalink":"", ## 页面全路径
	            "excerpt":"",
	            "text":"" ## 页面内容
	        }
	    ],
		posts: [  ## 在hexo\source\_posts目录下的md文件生成的页面,即博文
			{
	            "title":"",  ## 博文标题
	            "slug":"",  ## 博文md文件的文件名
	            "date":"", ## 时间
	            "updated":"", ## 更新时时间
	            "comments":true,
	            "path":"",  ## 在当前首页地址下的路径
	            "link":"",
	            "permalink":"", ## 页面全路径
	            "excerpt":"", ## 博文描述文字
	            "text":"", ## 博文内容
	            "categories":[ ## 分类
	                {
	                    "name":"Hexo",
	                    "slug":"Hexo",
	                    "permalink":"https://maiyikai.github.io/categories/Hexo/" ## 分类文件路径
	                }
	            ],
	            "tags":[ ## 标签
	                {
	                    "name":"Hexo",
	                    "slug":"Hexo",
	                    "permalink":"https://maiyikai.github.io/tags/Hexo/" ## 便签文件的路径
	                }
	            ]
	        }
		]
	}
1
2
3
4
5
6
7
8
9
10
11
12
13
14
15
16
17
18
19
20
21
22
23
24
25
26
27
28
29
30
31
32
33
34
35
36
37
38
39
40
41
42
43
44
45
46
47
48
49其实用不了这么多,简易版的:
		{
		    "meta":{
		        "title":"",
		        "subtitle":null,
		        "description":"",
		        "author":"",
		        "url":""
		    },
		    "pages":[

		    ],
		    "posts":[
		        {
		            "title":"",
		            "comments":true,
		            "path":"",
		            "text":"Windows Hexo 博客 github Git GitHub"  ## 匹配一般只匹配title 和text的内容
		        }
		    ]
		}
1
2
3
4
5
6
7
8
9
10
11
12
13
14
15
16
17
18
19
20写好这个文件之后,把它放在hexo\source文件夹下即可
依次输入命令:
- 输入命令
hexo clean清除缓存 - 输入命令
hexo g构建 - 输入命令
hexo d部署
- 输入命令
部署好之后,可以在自己的hexo主页使用搜索功能了
注:手动添加的方式一定要注意,添加或更新博文时,要同步更新 "content.json" 文件,否则会出问题
# 加入百度分析
- 百度分析注册/登陆地址:https://tongji.baidu.com/web/welcome/login (opens new window)
- 登陆之后,点击“代码管理>>代码获取”,看下图:
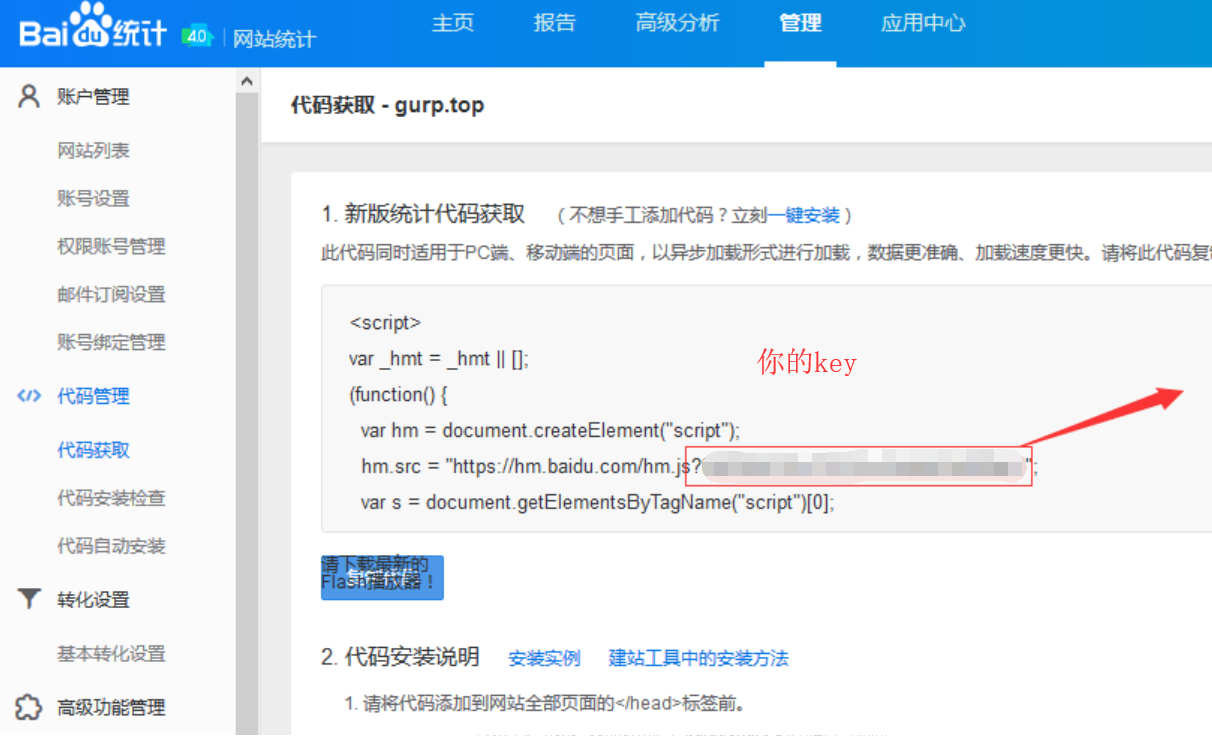
- 将这个key复制出来
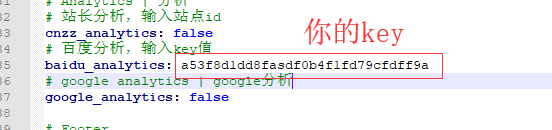
- 修改主题目录下的 "_config.yml" 文件中的
baidu_analytics,如下图
- 依次输入命令:
- 输入命令
hexo clean清除缓存 - 输入命令
hexo g构建 - 输入命令
hexo d部署
- 输入命令
- 部署上去之后就可以了
参考文章: